The first step is to login to the administrative console (back-end);
 |
| EasyPush: Umbraco Admin Interface |
 |
| EasyPush: Members Section |
 |
| EasyPush: Creating a New Members Group |
The new group you've created will then be listed at the bottom of the nodes in the navigator and automatically selected (so you'll see the properties);
| EasyPush: Member Group Properties |
Now you need to configure Members to be part of your new group.
Click the triangle (expand) the "Members" node in the Navigation View and then search for a user to add to your new group;
 |
| EasyPush: Members |
Click on the "Properties" tab (1);
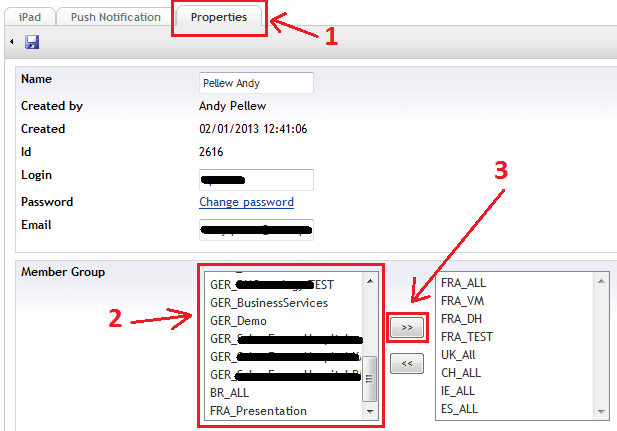 |
| EasyPush: Member Properties (With Group Membership) |
Click "Save" to save the changes.
You now need to look at the others documents I've produced as part of my work with Easypush (see Easypush Documentation Summary) and create some content that is can only be deployed to the new group you've created to test it.
No comments:
Post a Comment